Monday, May 4, 2015

part 3: the end result of white/silver hair

Note: This is Part 3 in a series. Here's Part 1 and Part 2. 


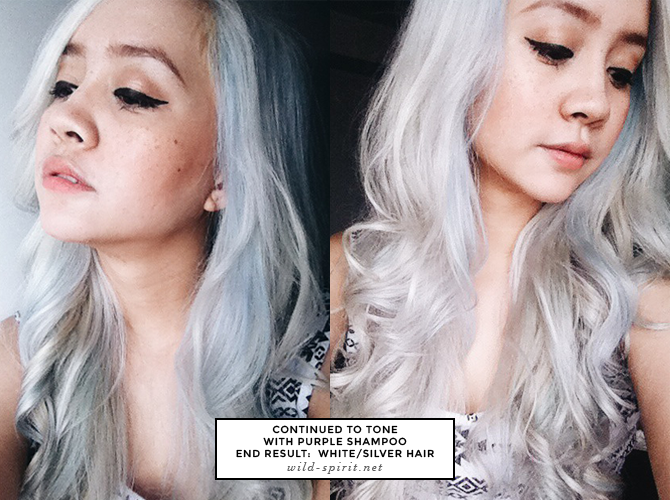
My (nearly) completed result! As you can see in the photo, there's still a bit of a yellow tinge. I haven't been able to tone it yet, as all the damage from four bleachings has finally showed up, and turned my hair into a gummy mess when wet. It feels elastic and gets easily tangled, so I've been giving it a break. I have to say, it came out better than I expected!

In this last post, I'll be covering what it's like to have platinum hair, how to work with your new hair, and upkeep/transitioning back. 


1. What's platinum/white/silver hair like?

You get a lot more attention. The amount of spike will depend on you - I'm short, quiet, don't typically wear "out there" clothes, so it went up a lot for me. 

The first time I went out with my new hair, I didn't even make it 30 mins before being catcalled. If this is something that bothers you a lot and you don't want to deal with even more male attention, I wouldn't suggest this. However, my personal opinion is that catcalling isn't going to be stopped by women trying to hide themselves, it's men learning yelling at strangers isn't romantic or even acceptable. 

I felt like people were expecting me to be a certain type of person (in my mind this person was rude, edgy, and didn't follow the rules). I ended up overcompensating and being very polite all the time. 

You also start constantly worrying about roots growing out, and when you'll have time to bleach again. I'm already nervous about events coming up that I'll need to fix my hair for.

It also depends on how healthy your hair was, but it will most likely take longer to dry and style. When mine's wet, I have to spend extra time trying to finger comb, then using a wide-toothed comb, and finally a brush, but gently. 

2. What can I wear with my new hair?


This is by no means the only type of clothing that you can/should wear, and there are obviously more styles that would look good on white/silver hair. After dying my hair, I have a tendency to wear neutrals a lot more, mostly black, because of how well it pops. I like slightly edgier pieces, but still in the realm of normcore. 

Here are a few outfits I think would really compliment this look. 


Rima Valdila of Fire On The Head has a great style, mostly black and white. It's normcore, but a little on the edgy side. This outfit could easily be dressed up with a statement necklace and heels for a fancy event, or dressed down with a denim jacket and flats for school. 


This outfit is more lowkey and casual, perfect for running errands, or those days where you really don't want to think about what to wear. Vintage type high-waisted shorts can be found at thrift shops (if you're lucky!) or bought at almost any store! Brandy Melville has many shirts similar to the one worn in the picture. 


If you're a little more dressy/urban, I would recommend taking a look at @bestdressx on Instagram. Virtually all their outfits would look amazing with white/silver hair, and although they're from some pretty expensive places (most of us can't afford clothes from Moda Operandi), similar clothes can easily be found on Forever 21 or other more affordable options. I would wear this to a dinner with friends, or even to school. 


I styled my hair with mostly black and darker colors. I wanted the focus to be on my hair, and this way it would really pop. Being short, I prefer high waisted anything, and tucking in the shirt extends my legs even more. I'm really loving hats with a wider brim lately, so I borrowed stole this Urban Outfitters one from my friend. 

I've had a long time obsession with collared shirts, and this one even had cute details like a seam on the front, and buttons going down the back. Extra bonus, I can even wear it backwards and it looks like another shirt! I bought it from Forever 21. 


Almost all my denim is from American Eagle. They're the only brand that carries jeans with shorter inseams that are actually short - other brands are still a few inches too long. Plus, they're constantly having sales and their denim is so stretchy and comfortable! I'm moving around all day, so I wouldn't be able to last 8 hours in skin tight, uncomfortable jeans. 

3. What's the upkeep like? How can I transition back to my normal hair color?

A few days after I finished my bleachings, I noticed my roots growing back already! It was terrible, and I hated to think that I would potentially mess up all my work again when I go back to touch up. 

Upkeep is definitely a chore. I haven't reached the 4-6 weeks milestone where it's suggested to retouch, but I would advise waiting for when you have longer than a weekend off. This is because it's never good to double process any part of your hair, and you wanna have a little buffer time in case it turns out terribly bad and you have to fix it somehow before interacting with civilization. 

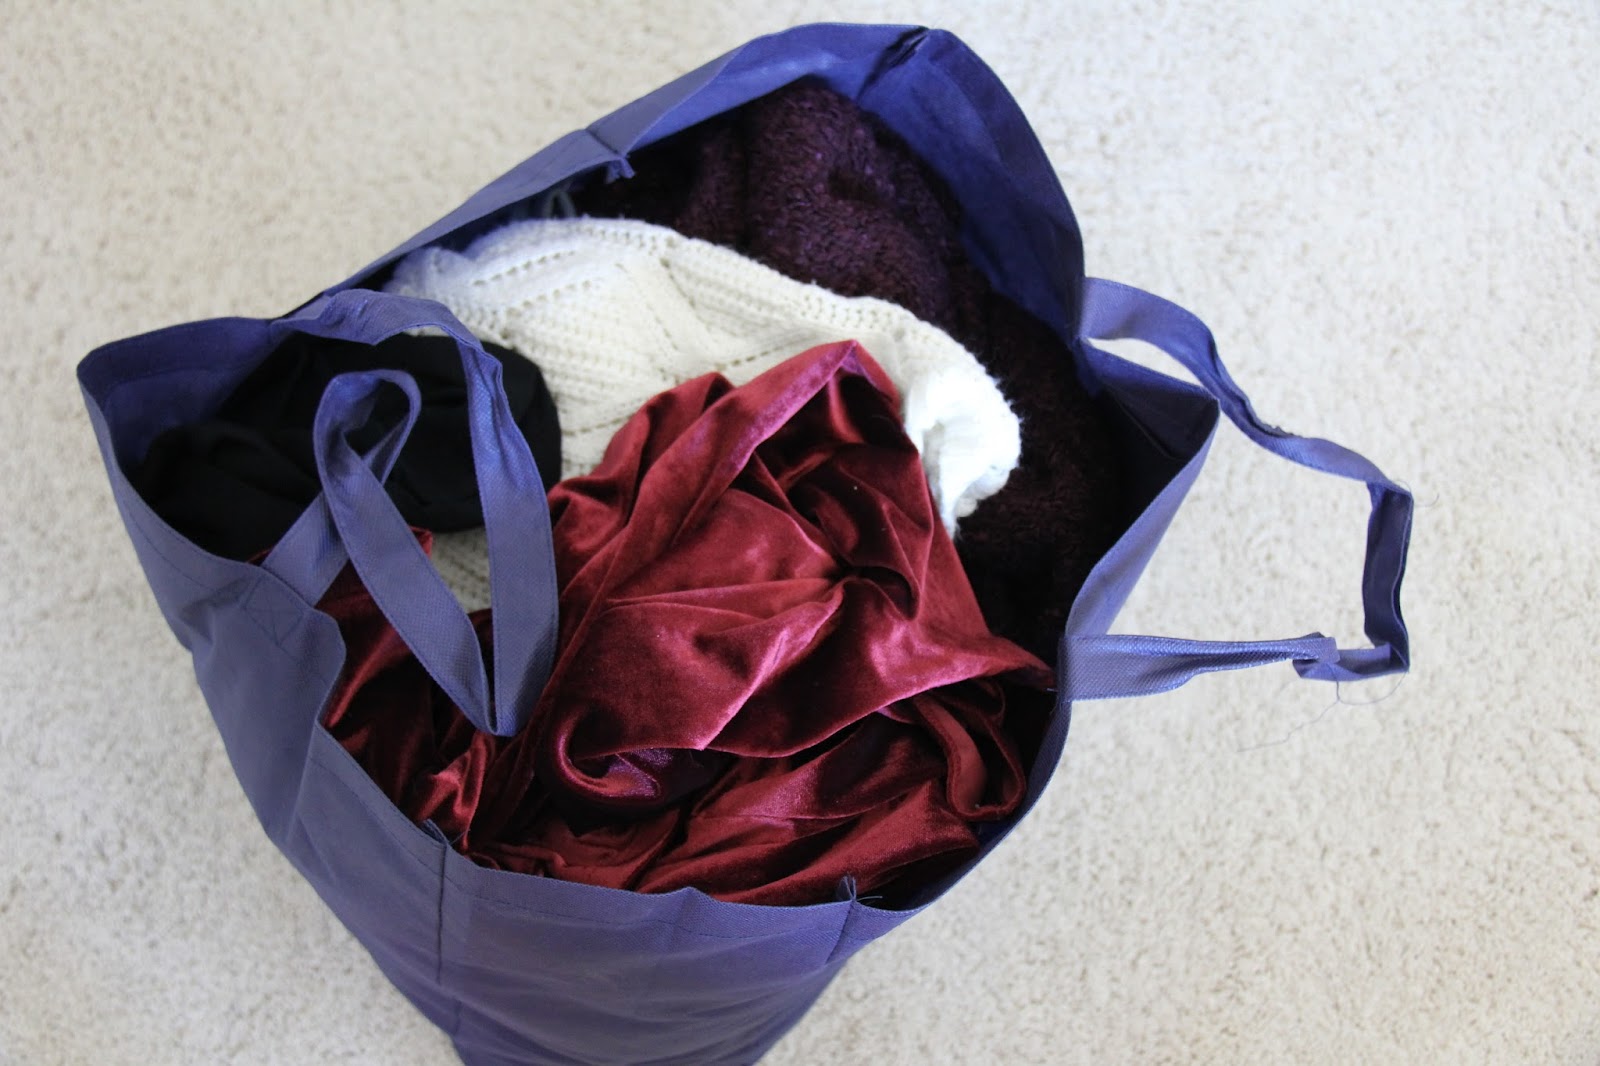
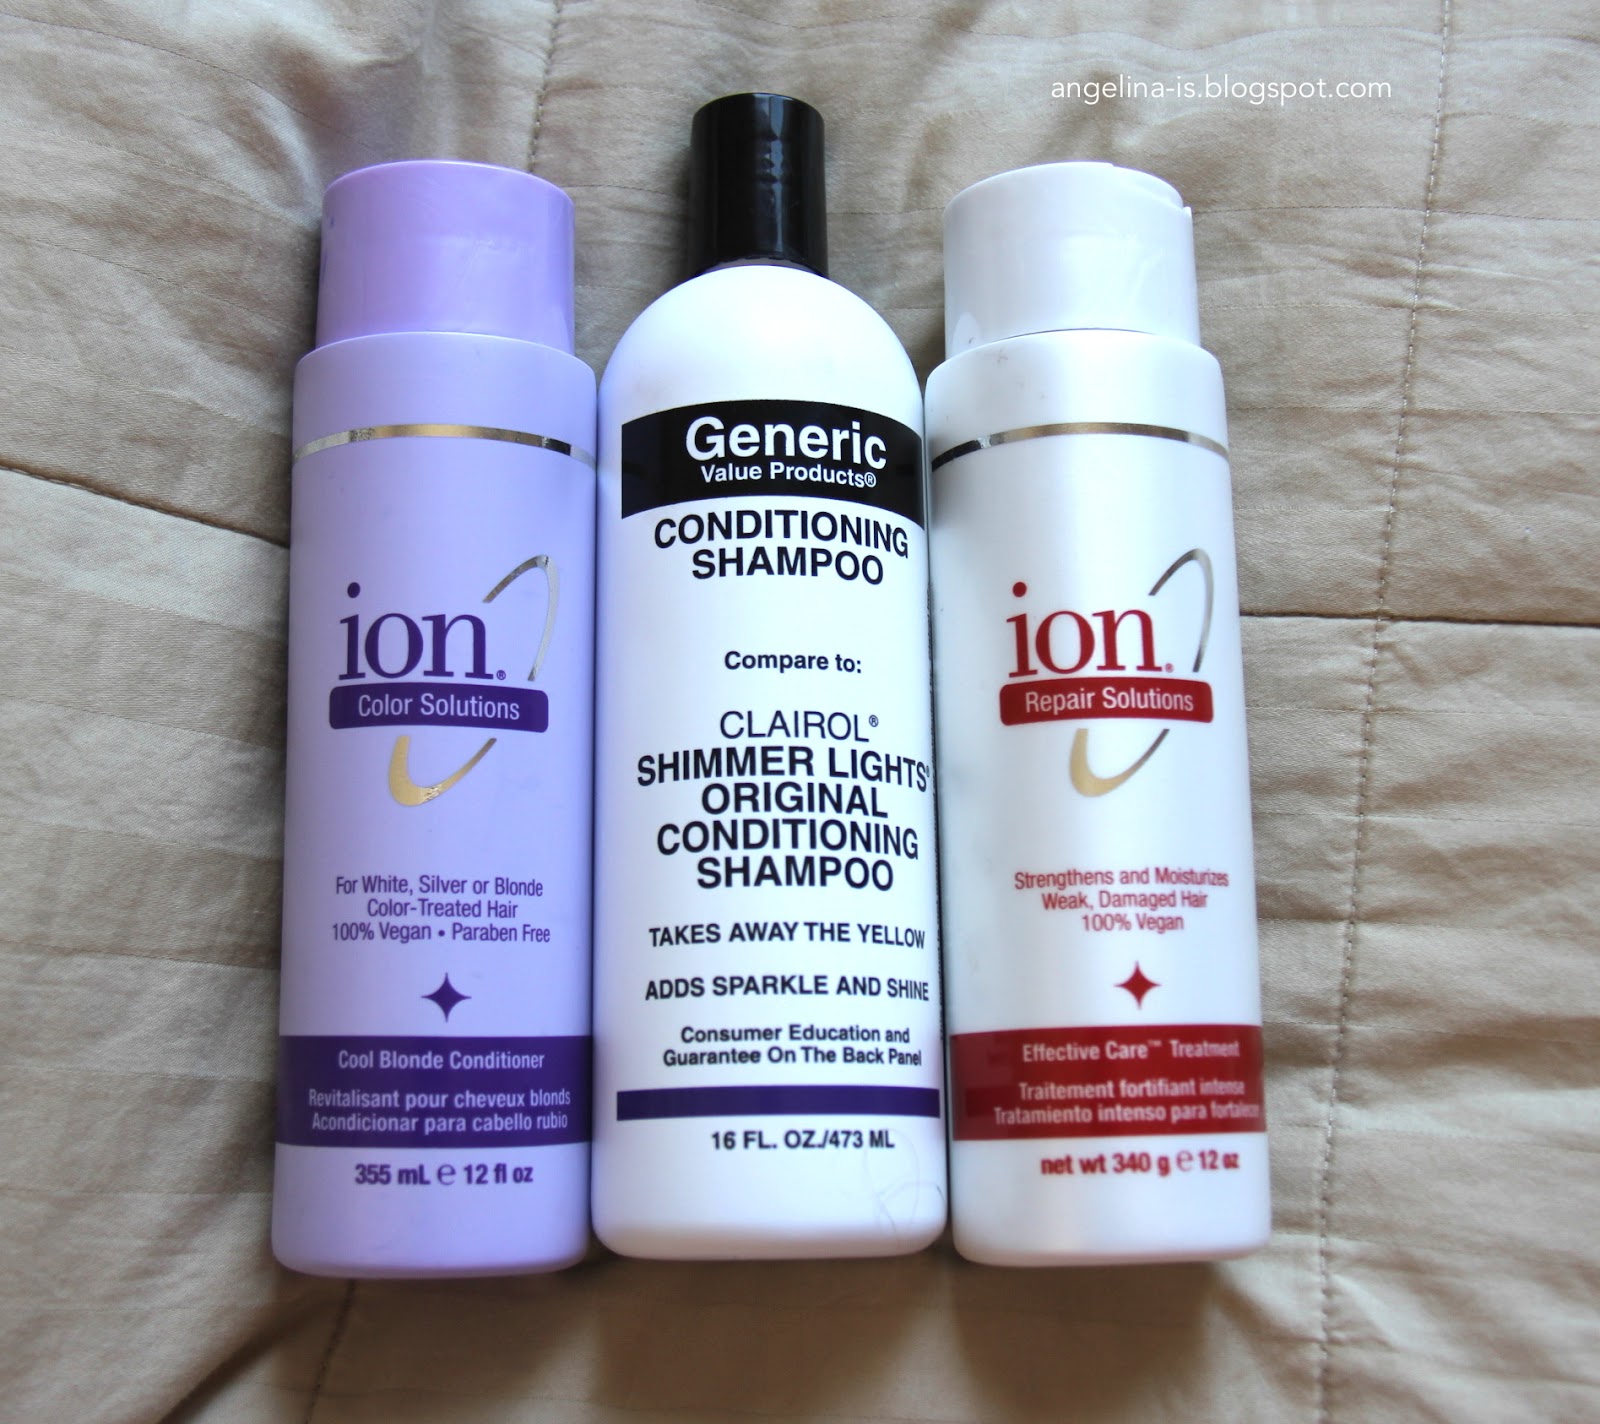
To keep my hair somewhat healthy, I rub in coconut oil after showers. I've reduced the times I shampoo, and when I do, I make sure to always use moisturizing conditioner. 

Transitioning back to your normal hair color will obviously depend on what that is. Lighter hair will be easier; just ease back on the purple shampoo, or dye your hair back. Darker hair is tougher. Since you've spent all that time lightening your hair, you might as well pick another color to dye it. 


I personally really like Amanda Steele's hair color here, although I'm not sure how it would look on my darker skin tone. 


Camie Juan of Wild Spirit has pink hair that's to die for. The only thing I would be worried about is root growth, as you can see in her photos as well. 

You can also simply buy a box dye closest to your natural color, and slap that on! After managing bleach, dye should be much easier. I would rather pick a shade lighter, because then when it grows out, it'll look like a very natural ombré. 

I hope this series has helped you out! If you have any questions about my process or in general, please do ask in the comments!

xx

Angelina

Monday, April 27, 2015

my experience with crossroads

source
     I've always been big on buying lightly used clothes for cheap, since it not only saves the environment, but my wallet as well. While I do like apps such as Poshmark or Vinted, it's never as great as actually going to a store and trying on clothes (stay tuned for a post about my experience on Poshmark). Enter Crossroads Trading Co, a mix between thrift shop and consignment store.

     Crossroads isn't the only type of store like this, there's also Plato's Closet and Buffalo Exchange. The Crossroads near me just had the best reviews on Yelp so off I went.


     I went off with a giant bag of clothes. And while my opinion may be somewhat biased, I think I have a pretty good sense of style. And yes, most of my clothes were summer, and they were buying for winter. BUT, I still expected to have them take more than 3 clothes out of my pile, giving me $12.75 store credit (for those of you who don't know about their policy, they give you 50% store credit, and 35% cash). I somewhat happily took the store credit, given they had a pretty good selection of clothes.
     I can't speak for all CTC stores, since I've only been to one, but here are a few things I noticed at my particular store. The clothing is all organized by color, which is aesthetically pleasing, but makes it a bit harder to find things in my size. I did not see anything upwards of a size L, so I would not take my chances if I were plus sized. I did find lots of Forever 21 priced the same as tops from Free People and Nordstrom, which makes absolutely no sense to me. The shoes are scattered around on the tops of displays, so that made it a lot harder to find my size, especially because I have very small feet as well. I was pleasantly surprised to see that they had fitting rooms, since many thrift shops/stores like this don't, and I've resulted to wearing long flowy skirts and large sweaters to make changing in public a lot easier. I even did it once Black Friday shopping at American Eagle. Weird looks all around, but it did save me the 15 mins waiting in the fitting room line.

source
     Anyways, after looking around for about 1 hr (that's how long it took me, but I'm a slightly slow shopper), I found 4 pieces I adored. A while ago online, I saw this adorable Nastygal top (ON SALE TOO!), and unfortunately it was sold out in my size. Lo and behold, I find the exact same top at CTC in my size! I almost fainted.


     In addition to the miracle top, I also grabbed a red and blue C&C flannel, a VS PINK mint sweatshirt, and a grey Theory tee. This all cost me $55, with tops averaging at $10.50, with the exception of the Theory tee at $15. In a regular mall, $55 would have bought me one of these items.

     I paired my sweatshirt with some soft black crochet trim shorts from Ecote. It's super comfy, but still cute enough to wear outside on days when you're just not feeling it.


       The Theory shirt is insanely soft and comfy. It's a little big on me, but I like how well it drapes. Plus, it would have retailed for over $100, and I got it for $15, basically brand new! I paired it with white Bullhead shorts and a geometric necklace from Forever21. It's a quick, no-fuss look that would be perfect for lounging outdoors in the summer.


     This look I would wear more often in the fall. This flannel was sooo soft (sensing a trend here?), so I had to get it, even though it felt too bright for me originally. I feel like I'm walking the line between normal person and lumberjack, but paired with some pointy leopard print flats really turns it around.


     On the way home, I rummaged through my bag of rejects, and found several winter items the salesgirl clearly had not even looked through. I had a new Free People heavy cardigan, several lighter cardigans, and some Brandy Melville (popular any time of year with teens). I didn't particularly mind, because they would've offered $20 for it all, but still.
     All in all, I'm pretty happy with Crossroads as a buyer. As a seller, I would not come here unless you really need cash, or want to get swap some clothes quick (and don't mind losing some money). Definitely try your hand at selling online first, which is more time consuming, but so much more rewarding in the end. The selection of clothes is great, and appeals to many styles.
    
     Have you shopped at Crossroads or another type of store like this? Let me know in the comments!

xx

Angelina

Wednesday, April 22, 2015

part 2: starting the journey from black to white/silver

NOTE: This is part 2 of a series. Part 1 covers how to make up your mind about dying your hair, I'd encourage reading it if you're still a little iffy. 


After I more or less made up my mind to dye my hair, I slept on it for a day. I would've slept longer on it, but Sally's was having a sale, and it was ending at midnight. Being the bargain hunter I am, I had to make up my mind then. This post will cover supplies, the stages of bleach, and my bleaching technique. 

1. Supplies


Here's what I got:
Ion Color Brilliance Powder Lightener 1 Lb Tub 
Ion Color Brilliance Extra Wide Tint Brush
Ion Effective Care Treatment 12 Oz
Ion Cool Blonde Conditioner
Ion Sensitive Scalp 30 Volume Creme Developer 32 Oz
Wella Color Charm T18
Generic Conditioning Shampoo

I had a $14 discount, so it added up to $56. It took about 6 business days to arrive, and it was very well packaged. All the tops had been taped down to insure there wouldn't be any spills.

Here is where I strongly recommend you to not became overly excited with the arrival of your hair supplies, and attempt to bleach your hair by yourself in a rush because you still have work that's due tomorrow and school in the morning. Can you guess what I did?

2. Stages of bleach

It was terrible. It was horrible and orange in spots and stripey. Because I tried to do it by myself with no help, I hadn't evenly distributed the bleach, and it lightened my hair at different speeds. I couldn't deal with my hair, so I actually ended up playing hooky the next day.

I was still determined to dye my hair though, and couldn't find any temporary "normal hair color" dyes (I still had about a week till spring break). Fortunately, I discovered that spray on concealers for gray hair would work just as well. Also, I would braid my hair while wet and it would dry in loose, mermaid waves, which concealed the uneven-ness very well.

I washed my hair with only the Ion Protein Reconstructor, no shampoo because my hair was so dry it didn't produce any oil.


My second bleach, I had a friend help me, and it turned out much better. I also soaked my hair in Extra Virgin Olive Oil for 30 mins beforehand. I focused mainly on the scalp bc when I Googled "bleach scalp burns", I got quite nervous. Pouring a little on my palm and then running my hands through my hair worked very well.

I was not a fan of the color, but it was much more even than before. I spaced out the first two bleachings with a little more than a week in between, and my hair was still healthy afterwards.

I couldn't really tell if the Reconstructor had helped my hair, but I found my Tigi Moisture Maniac conditioner did a much better job. Again, no shampoo.


I waited 3 days before my third bleach, and this was because I really couldn't stand the color. I followed the same procedure- EVO for 30 mins, bleach, conditioning with the Reconstructor and Tigi.

I noticed when I peeked at my hair, it looked darker than it was once I rinsed it out. Not sure if this was just my hair, or typical.

Afterwards, I used a little bit of toner, but I wouldn't recommend that as it didn't have much impact. I washed with Generic purple shampoo, purple conditioner, reconstructor, more shampoo but leaving it on for 3-5 mins, and then moisturizing conditioner. I probably wouldn't suggest overloading your hair with so many products, but the purple made a subtle difference.


My last and fourth bleach! It turned into a very light blonde, like the inside of a banana. I toned it just using purple shampoo and conditioner at first, waited a day, and then used T18 to tone for ~20 mins. I freaked out because I thought it turned my hair gray/purple, but again, it washed out lighter.

3. My bleaching technique

I didn't take pictures because I'm not an experience bleacher, and there are many helpful Youtubers and bloggers who would explain much better. But in case you are curious how I did it, I'll walkthrough it.

I first covered all parts of my hair on top, from midshaft down. This is because hair closer to your roots will lighten faster due to heat from your head. Then I flipped my head upside down, and moved all my hair so the bottoms were exposed. I coated those as well, minus the roots. Then I covered my hair with a plastic bag, and twisted it up, towel turban style. I tried to make it as airtight as possible.

After about 30 mins, I went back and covered the roots, using the same technique. Each time I left the bleach on for however long I could take it, usually about 1.5-2 hrs. I don't think this is the "proper" way to do it, and it may result in bleach burns depending on your scalp. For somer reason, I was fine, and it didn't damage my hair.

Thanks for reading! For the last part, I'll be covering the end results and what to expect. 

xx

Angelina

Disclaimer - all opinions in this post were my own. I was not sponsored by Ion or Sally Beauty. I will not be receiving any compensation if you buy products by clicking through the link on this post. 


Friday, April 17, 2015

what to wear for a beach day

Beach days are my favorite thing to do when the weather finally gets warm enough. I've never actually swam in the ocean, but just tanning in the sun with a bowl full of watermelon brings the best summer memories. It hasn't gotten warm enough here quite yet, but so soon.


To hopefully usher in the warm weather faster, here's an outfit I wore last time to the beach.


I adore circle sunglasses because they're something different from Wayfarers and aviators. They're just the perfect amount of edge to compliment the more feminine pieces, but they also work great with neutrals and more urban outfits. I got these from Forever21. 


I borrowed my friend's romper from Wet Seal, but I've seen this style everywhere. The blue is bright without being neon, and there's a tie at the waist so it fits any size. When the temperature dipped later at night, I wore an oatmeal cardigan layered over it. For fancier events, you could easily dress it up with a black blazer and heels. 


Basically any hairstyle works well with this romper. I started off in a bun, then took it down for loose waves and pinned it back. I wanted to show off my shoulders more and put it up in a ponytail, which complimented my waves well. 


My favorite thing about going to beaches in the spring or fall is that there are barely any people. It's still warm enough to make it by, and you can actually get a decent spot on the beach with more than 2 feet away from the next person. 


I'd always recommend staying for the sunset at the beach - look at the colors! There were also lots of little bonfires, but I didn't any great photos of those. From far away, they looked like mini stars. 


We also tried out light painting. I think it worked out pretty well. We used the flashlight function on iPhones. You just have to remember every light pattern shows up, even if you go fast. It'll just show up thinner. I would definitely suggest trying this - you don't even need to be at the beach, you can just turn off the lights in your room. All you need is a tripod and a light. 

I'd love to hear about what you love about the beach, and if you've tried light painting before!

xx

Angelina


Sunday, April 12, 2015

part 1: my journey from black to white/silver


I've been wanting to change up my hair lately. I've done streaks and ombré in the past, so this time I decided to do something really drastic. Drastic like nearly killing it with bleach and turning it silver!

Since it's a loooong process (I'm still not done!), I'll be breaking it up into bits. This first post will be about deciding whether it's a good look on you, which route to go, and finding inspiration.


I. Is it for you?


Count up the points on the boxes you would agree with, and use the chart below. These are just my opinions, and they should in no way deter you if you have a gut feeling that you'll love it! You know you way better than I would. 

0-10 pts - Mmmm, probably not
Based on your responses, I would not suggest trying this out if you don't have blonde hair already. It can be a huge transition, that takes up a lot of time and money, and why not spend that on something you know you'll love for sure?

10-15 pts - Hmmm, maybe
You seem like you're on the edge between loving it, and wanting to keep the same hair. I would suggest trying on a wig if possible, or downloading some apps to Photoshop your hair/face. I used Color Fashion, bc I needed something free, and that was all I could find at the moment, being too lazy to get on my laptop and use actual Photoshop. It could only lighten my black hair to gray w/o looking completely fake and missing the point. 

15-30 pts - Give it a shot
Go for it! You have most of the requirements (in my opinion) that would help make the time and money investment worth it! It seems like you'd really enjoy having white/silver hair, and it would suit you well. 

30+ pts - Don't even hesitate
If you agreed with almost everything listed, it will 99% be for you! I would still suggest using the wig/Photoshop/app method first; you can never be too sure. 

II. Which route to go?

Now that you've decided to go for it, congratulations! It can be a daunting process, but it'll definitely be worth it in the end. As far as I know, there are pretty much only 2 methods- at home or in a salon. You may be able to mix the two methods, although I haven't done that before, so I can't give advice on it. I will be talking mainly about my experience having done it at home,  and linking to a few helpful articles where it was done in a salon. 

At home:
This is definitely a cheaper way to do it, although it requires a lot more energy and thinking on your part. I was not in the mood to shell out more than $100, so I went this route. I watched a very helpful Youtube video, and went straight to buying all the products she mentioned. A little bit of a lazy approach, but it worked very well, and I read the reviews for each item. 

Also, it just so happened that Sally's (where I bought all my supplies) was having a 25% off sale, and I bought a membership card which gives you a special discounted price. I saved about $20! My total ended up being around $60. I will review and provide more details about which products I used, and how well they worked out for me in a separate post later. 

For at home, it's almost impossible to do by yourself. Bleach is a very tricky thing, you can't just slather it on like dye, and end up with an even hair tone. It will lighten differently based on heat from your head, and how much bleach you've put on. Take it from me, I tried to do it completely by myself the first dye, and ended up with stripe-y tiger hair. 

If you are very determined to do it yourself, or don't have anyone available to help, I would strongly suggest a hand mirror that enables you to see the sides and back of your head. 

In a salon:
Costs will obviously differ based on where you live, and what salon you go to, but as a general rule, I don't believe good salons will offer bleachings/lightenings at fewer than $75. You will also need to have it toned, and possibly cut if the damage is significant at the ends. This article is pretty helpful for money/time guidelines. 


III. Finding Inspiration

I was on the edge originally about dying my hair white/silver, bc I'm Asian, so I was wary of accidentally looking trashy with a tan and platinum hair. I also wasn't sure if it would flatter my skin tone. 

After multiple variations of Googling something like "asian white hair", "silver hair asian", and "platinum hair asian", I found a few gorgeous examples of what I hoped I would look like. I didn't focus so much on finding Caucasians with hair I liked, since it would not have been helpful to me, but I'm sure a quick search will turn up many results for you. Here are a few (Asian) hair inspirations:

Amy Pham:


Soojoo Park:


Hopefully you've gotten some help with making up your mind! I would definitely recommend sleeping on it a few days. Next time, a walkthrough of my actual process!

xx

Angelina


Saturday, September 27, 2014

DIY Cut Out Heart Tank


Picture
The Before
Picture
The After

   I have a bit of a problem with shopping, like most girls out there. Not only do I shop constantly, I have a habit of getting things I don't wear as much as I should, because of style, inconvenience, and simply "not feeling like it". 
     This tank is one of my cast offs that falls into the category of inconvenience. When I bought it, I imagined wearing it as a coverup with my swimsuit, strolling on the beach. The problem with that was that we didn't really go to the beach this summer, and the tank ended up in the back of my closet, until I discovered it recently while cleaning my closet (to prepare for cramming it with even more clothes). As you can see, the back opening is rather large, and not exactly school appropriate. I loved the color and softness though, so I decided to reinvent it as a cut out heart tank.

Supplies Picture

Supplies Needed:

-The shirt/tank you plan to heart-ify
-Seam ripper (I lost mine so I used scissors)
-Pins
-Sewing machine (not pictured, you could probably do it w/o)

Optional:
-Water soluble pen to mark where you want to put the heart

 (Skip if you don't have a shirt with a confusing back) First, I laid my tank flat on a table, and envisioned where I need to cut to "untangle" the back. In this case, it was the seam in the top middle of the shirt, and shoulder seams on either end. 

Picture


To rip the seams, I find it's a lot easier if you stretch the fabric so that the seams are prominently displayed, like so. 

Picture


I cut the top middle and shoulder seams to detach the rolled parts from the rest of the shirt. I then unrolled them. 

Here is where having an iron would've made my job a lot easier. Unfortunately, I couldn't find that either, so I just smoothed it out with my hands to make pinning easier. 

PicturePicture

  I then pinned the two sides together (you can see they're curling). This is where you would jump in if you just have a normal shirt/tank. I'm a fan of eyeballing, so I didn't draw on where I would put the heart, but you could if you want to make sure it'll turn out the way you wanted. 


PicturePicturePicture

     I sewed up the sides, leaving a gap in the middle for me to cut the heart. I started with one side, then went to the other. I wasn't really a huge fan of how the first side came out, but I was fortunate I cut it smaller, so I could go and fix it later. Another thing to remember is to make sure you're only cutting through one layer of fabric, not two, which has happened to me multiple times!
     Finally, I pulled the inside edges of the heart to make it curl and keep from fraying too much, and voila! The cut out heart tank is finished. 

Picture

PicturePicture

Picture

Picture

Tank - Brandy Melville
Shorts - Pacsun/Bullhead
Bandeau - Urban Outfitters/Kimchi Blue
     Thanks for reading! Please comment and let me know what other posts you'd like to see, or what I could improve on, as I'm just starting out my blog. 

                                                  xx
                                           Angelina